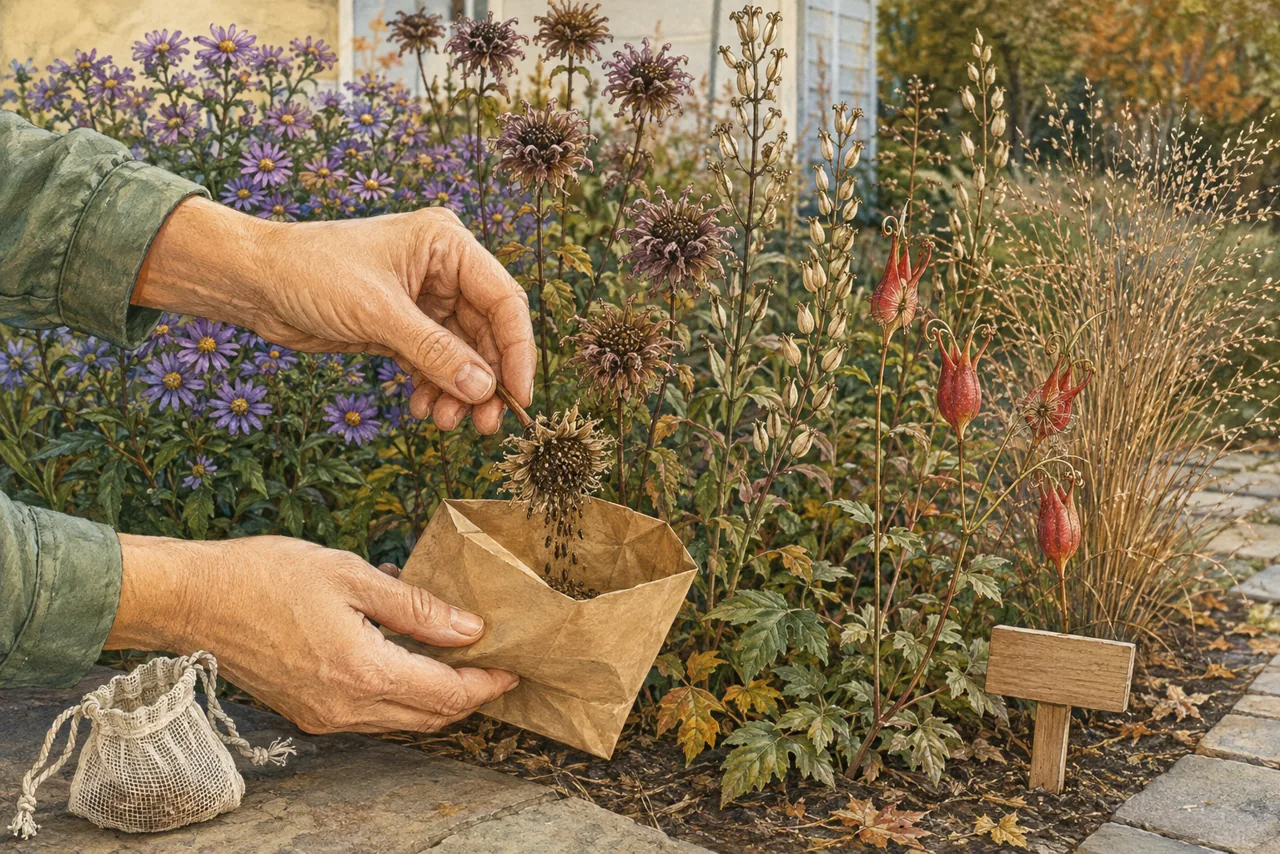
Begin with a known garden plant, not a mystery seedhead
The best first collection is from a healthy plant you own, can identify, and want more of in the same kind of site. Mark promising plants while they are still in flower. University of Maryland Extension recommends identifying the species before harvest and marking intended seed plants in advance because a brown late-season stem can be difficult to distinguish from its neighbors.
Write down what the nursery tag or planting record actually says. Seed from a named cultivar, hybrid, or open-pollinated garden plant may not reproduce the parent's exact height, color, or form. Even seed from a straight species has a pollen parent you may not know. A label should describe the collection—species, source plant, place, and date—not guarantee a clone.
Keep the task inside the garden unless you have explicit permission elsewhere. UMD advises against collecting in public, state, or federal parks and notes that protected species may require permits. A roadside is not automatically legal or safe, and a plant growing nearby is not automatically native to the county. For a small home project, purchasing documented local-source seed or exchanging clearly labeled garden-grown seed is usually a better route than taking from a wild population.
Read ripeness from the plant instead of the calendar
Bloom time is only the beginning of the seed clock. UMD gives six to eight weeks after flowering as a useful general observation window, but weather, species, and even separate heads on one plant can shift the actual harvest. Look for a dry head or capsule, mature seed color, and seed that separates with a light touch. If the structure is still green, fleshy, damp, or firmly holding soft seed, return later.
Test one head over a white sheet of paper. A ripe columbine capsule begins to open and releases hard dark seed; a dry bergamot head sheds small nutlets when tapped; a mature grass seed should pull free without tearing green tissue. Foxglove beardtongue seed is dustlike enough that UMD specifically cautions against winnowing very small seeds in moving air. These cues help with timing, but they do not replace a species-specific propagation reference.
Collect after morning dew has evaporated and not during or immediately after rain. UMD warns that seedheads should be completely dry before storage. If a sample feels cool or pliable rather than papery and crisp, leave it on the plant. Taking a small ready portion today is safer than cutting an entire plant because one head looks brown.
- Ready: dry structure, mature color, and seed that releases without force.
- Wait: green tissue, soft seed, moisture from dew or rain, or a head still actively flowering.
- Skip: mold, obvious disease, heavy insect damage, mixed weed seed, or a plant whose identity is uncertain.
Label first, then take a small clean sample
Write the common and scientific name, source bed, collection date, and any cultivar or provenance note on a paper bag or envelope before touching the plant. Use a separate container for every species and every source you intend to keep distinct. The USDA Natural Resources Conservation Service likewise treats labeling at collection time and keeping collections separate as basic safeguards against mix-ups.
Hold the labeled container beneath the head, then clip, tap, or gently strip only the mature portion. Clean scissors, pruners, gloves, and the work surface between species. Never combine look-alike seed because sorting it later is usually harder than slowing down in the garden. Stop after the amount needed for a modest tray or patch; a small garden does not need restoration-scale quantities.
Leave most stems undisturbed when habitat and self-sowing are part of the garden goal. There is no useful universal harvest percentage for every home bed: seed production and wildlife use vary by plant and year. A practical small-space rule is to choose a few clearly ripe heads, leave the majority standing, and return only if the intended sowing project still lacks enough clean seed.
Dry and clean one species at a time
Keep newly cut heads in paper or another breathable container in a dry, low-humidity place. UMD recommends an additional two to four weeks of drying after collection for dry-seeded species and warns against sealing incompletely dried material in plastic or glass because stagnant moisture can support mold. Spread crowded heads in a shallow layer and keep every original label attached to the batch.
Line the cleaning area with fresh paper and handle one species at a time. Gently shake or rub dry heads, then use an appropriately sized screen or careful hand sorting to remove stems and obvious chaff. Replace the paper and clean tools before the next species. Do not use a fan for Penstemon or another dustlike seed; the seed can disappear with the chaff.
Discard moldy, badly insect-damaged, or diseased material rather than trying to rescue it for storage. Fleshy fruits and moisture-sensitive seeds require different handling from the dry perennial and grass heads covered here. Beginners should pause and find exact Extension or nursery-manual guidance before processing a berry, drupe, nut, or species described as hydrophilic.
Match storage and germination to the species
Native seed does not share one dormancy pattern. Some species germinate without pretreatment; others need a cold-moist period, warm treatment, scarification, or a sequence of conditions. UMD notes that germination may also be uneven. Do not put every packet in a refrigerator or winter-sow every species simply because those methods work for some natives.
For seed that is confirmed to tolerate dry storage, finish drying before transferring it to a clean labeled envelope or another recommended container in a cool, dark, dry place. Penn State emphasizes recording the plant and harvest date because viability changes with time. Add the source bed and intended sowing location so the packet remains useful even after the memory of harvest day fades.
Before sowing, look up the exact scientific name in a university Extension resource, the USDA native-plant nursery manual, or a reputable regional propagation guide. Record the treatment, sowing date, medium, and emergence rather than calling a failed tray bad seed without evidence. A seed batch can contain empty seed, and sound native seed can still wait for environmental cues.
Turn a few packets into a traceable small-garden plan
Assign each collection a short code that connects the envelope to a notebook or spreadsheet: plant, source bed, date, treatment, and destination. Keep separate collections separate until you have decided whether mixing them serves the planting goal. When sharing seed, use a county or broad source area rather than a private street address, and pass along uncertainty about cultivar status or identification instead of dropping it from the label.
Sow a limited number first and keep the parent plant in place until seedlings can be checked. Plan for the mature footprint, not the size of the tray. The Plant Finder and linked garden plans can help match the future plants to light, moisture, height, and access before a successful germination batch becomes too many plants for the bed.
Review the standing stems after collection. A tidy edge, repeated plant groups, and a labeled propagation area let a small yard keep winter structure without looking abandoned. Seed collecting should strengthen that system—more known plants in known places—not create an unlabeled jar collection or strip the garden of its fall and winter habitat.
The working plant palette
These roles are a starting framework. Confirm county-level nativity, provenance, mature width, and nursery availability before purchase.
University of Maryland Extension includes wild columbine among native perennials that are relatively easy to collect and grow. Watch its capsules earlier in the season and collect only when they are dry and beginning to open, not while they are green.
UMD also identifies golden groundsel or ragwort as an approachable seed-grown native. Its light, wind-dispersed seed calls for a labeled container ready before the head is handled; retain plenty of heads in the garden.
The dry clustered heads can be handled over a paper bag so loosened seed is not lost. Because chaff and seed can look similar, keep this collection separate and label it before cutting the first head.
Its mature capsules hold very small seed. Work over paper, avoid windy cleaning methods, and research Penstemon treatment before sowing rather than assuming every dark particle is viable seed.
A known garden clump offers a safer place to learn grass-seed readiness than an unidentified roadside stand. Seed that is mature should release readily, but positive identification and a clean, single-species collection remain essential.
A practical sequence
Confirm the plant, preserve its tag or source record, and mark only the healthy plants you may collect from.
Check several heads after dry weather; harvest only the portion that releases mature seed without force.
Use a separate pre-labeled paper container for each species and source, then leave most heads standing.
Air-dry dry-seeded material in its breathable labeled container and clean one species at a time.
Confirm that species' dormancy treatment, record the sowing method, and match the eventual plants to a measured site.
- Do not collect from public, state, or federal parks, another person's land, or any wild site without explicit permission and any required permit.
- Never collect a rare, threatened, endangered, or uncertain plant; use a documented conservation or nursery source instead.
- Avoid roadsides with traffic, spraying, contaminated runoff, or unsafe footing. A roadside plant is neither automatically legal to collect nor reliably local native stock.
- Do not seal damp seedheads in plastic or glass. Dry-seeded material needs breathable post-harvest drying before any recommended closed storage.
- Keep species and source plants separate, label at the moment of collection, and clean tools and work surfaces between batches.
- Do not assume seedlings will be identical to a named cultivar or parent plant, and do not apply one storage or stratification recipe to every native species.
- Leave ample seedheads for birds, insects, winter structure, and natural reseeding; take only what has a defined propagation use.
Continue planning
- Match future seedlings to a measured site: Use the Plant Finder to filter by light, moisture, height, and garden role before deciding how many seeds to sow.
- Give seedlings a role in the Sunny Postage Stamp: Use a small repeated group only where the species fits the plan's sun, soil, and mature-size conditions.
- Review eastern red columbine: Check its mature habit and part-shade fit before assigning collected seed to a bed or propagation tray.
- Review wild bergamot: Allow for its spreading habit before turning one dry seedhead into a larger summer-flowering patch.
- Review little bluestem: Reserve a sunny, well-drained place for the mature clumping grass rather than judging space by a seedling.
- Keep the rest of the fall habitat: Route leaves and preserve standing structure after taking the small seed sample the propagation plan needs.
- Keep seedheads intentional in a small yard: Use clear edges, repetition, and access routes so uncut stems read as part of the design.
- University of Maryland Extension — Collecting & Sowing Native Plant Seed ↗
- Penn State Extension — Seed Saving — Simple and Free ↗
- Penn State Extension — Seed Saving Basics ↗
- USDA NRCS — Plant Materials Collection Guide ↗
- USDA Forest Service — Nursery Manual for Native Plants: Seed Processing and Storage ↗
Plant ranges and recommendations change as records improve. Read how we separate range, site fit, and design judgment in our sources and methodology.