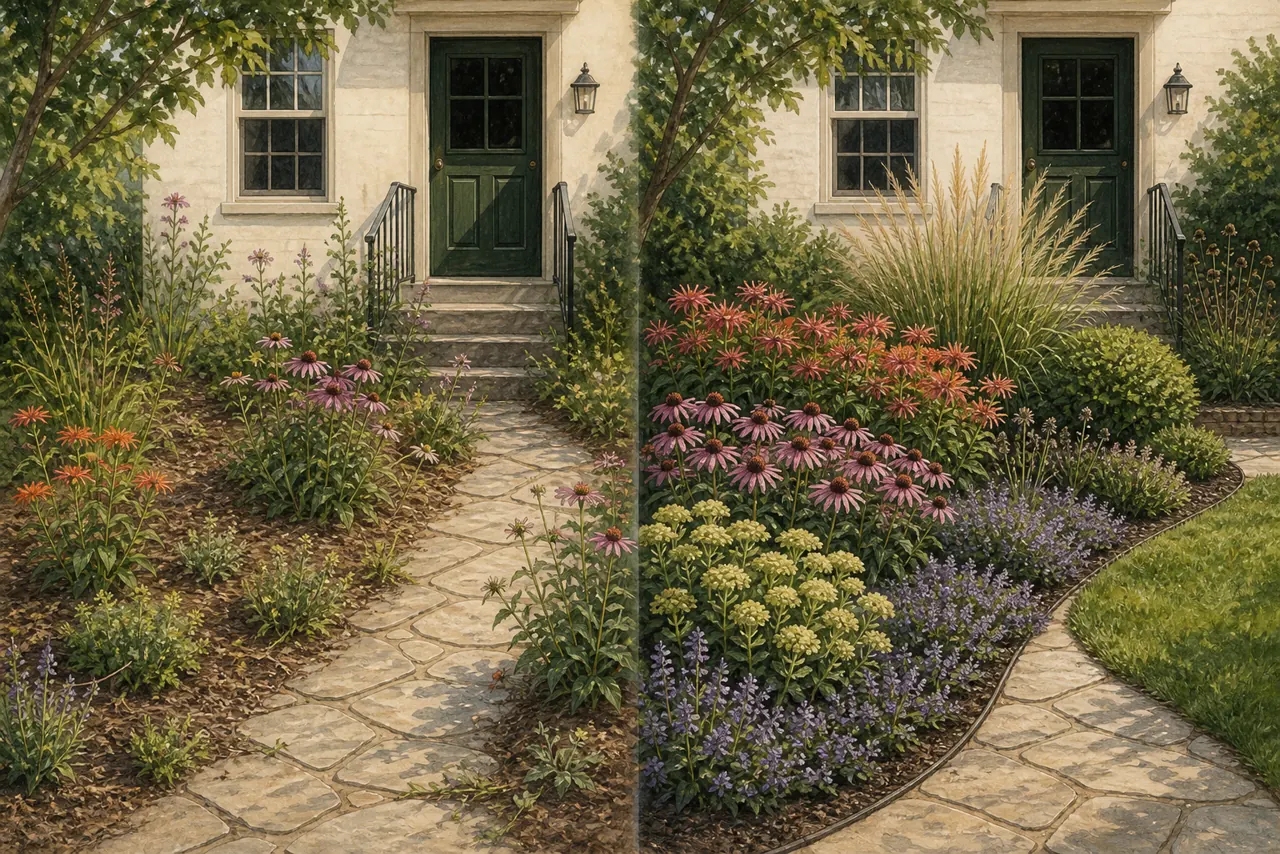
The “messy native garden” problem is usually not about whether a plant is native. It is about missing visual structure: no readable edge, too many isolated species, plants blocking circulation, or every stem occupying the same height. A small bed can support insects and birds while still signaling that someone planned and maintains it.
Prepared by Pocket Habitat · reviewed against Mid-Atlantic Extension and federal conservation guidance · editorial method
Start with the view from outside the bed
Stand at the sidewalk, driveway, front door, and the room that looks onto the garden. Mark the parts that must remain open: the walking line, mailbox access, a hydrant or utility meter, windows, downspout outlets, and any street sight triangle. These fixed clearances are the frame. Plant choice comes after the usable footprint is known.
In a small front garden, one strong bed shape is usually calmer than several unrelated islands. A simple rectangle, broad curve, or repeated line is easier to read and maintain than a narrow wavy edge. Penn State Extension’s garden-design guidance emphasizes line, rhythm, and repetition; those tools work with native plants just as they do with any other palette.
1. Give the bed a legible boundary
A narrow mown strip, stone edge, path, or crisp transition to pavement tells a passerby where the garden starts. The inside can then be layered and seasonally dynamic without reading as abandonment. The boundary does not need to be plastic edging: it can be a maintained line between a low ground layer and the walk.
Choose an edge that matches how the site is used. Beside turf, allow enough width for the mower wheel. Beside a public sidewalk, keep arching stems and seedheads out of the pedestrian envelope. Around a spreading groundcover, use a boundary that can be inspected and edited from outside the bed.
2. Repeat groups instead of collecting specimens
One each of twelve species can read as a collection of unrelated dots. Repeating fewer species creates visible masses and helps pollinators locate a resource. In a compact bed, start with a ground or matrix layer, repeat one or two flowering plants, and add a limited number of structural anchors.
There is no universal group size. Mature width matters more than a slogan about planting in threes. A broad blue wild indigo may need only one well-placed specimen, while a smaller accent such as eastern red columbine can be repeated through a ground layer. Draw every plant at mature width before ordering.
3. Layer height away from access
Keep the lowest, most stable layer beside paths, doors, and visibility lines. Pennsylvania sedge can form a low dry-shade matrix where its site requirements fit; aromatic aster can make a lower sunny fall mound. Place taller plants behind them and give species that lean after storms room away from circulation.
Layering should respond to light as well as the view. A tall south-side plant can shade a sun-dependent neighbor. The University of Maryland’s pollinator-garden guidance recommends structural complexity while warning gardeners to remain aware of each plant’s sun needs.
4. Build a winter skeleton
Flowers are temporary; structure carries the composition through the rest of the year. Repeated clumping grasses, persistent basal foliage, a carefully sized shrub, and retained seedheads can keep the bed legible after frost. Little bluestem can provide copper stems in a sunny dry-to-medium bed, while a shrub such as Virginia sweetspire needs enough room for its mature width.
Winter structure does not require leaving every broken stem indefinitely. Retain healthy standing stems where they do not obstruct access, then make a deliberate late-winter or early-spring edit. Leave some fallen leaves beneath plants where they can remain without blocking drains or creating a slippery path.
5. Decide where spreading is welcome
Spreading is not the same as invasive, but it still needs a design decision. A colony-forming native can be an efficient ground layer in a bounded zone and a maintenance problem beside a delicate neighbor. Mark the line a colony may cross, check it during the growing season, and move divisions while the planting is still easy to edit.
Place clumping plants beside the smallest neighbors and access routes. Give more assertive species a path, wall, mowing strip, or repeatable hand-edited boundary. The goal is not to prevent every plant from moving; it is to make the permitted movement visible in the plan.
6. Design a bloom sequence, not a single peak
Choose at least one meaningful flower group for spring, summer, and fall, then use foliage and structure to connect them. A small garden does not need dozens of species to extend bloom. Repetition of a shorter, site-matched palette is more likely to look intentional than a long list of one-off plants.
For a sunny Mid-Atlantic example, foxglove beardtongue can provide a spring vertical, butterfly weed or wild bergamot can support summer color, and aromatic aster can finish in fall. Confirm local range, moisture, and mature behavior before using that sequence. The fall pollinator guide explains how to close a late-season gap.
7. Make maintenance part of the drawing
Every bed needs a place to stand, reach, water, and edit. If the planting is more than an arm’s reach deep, include a stepping point or narrow access route that does not compact the main root zone. Keep plant labels or a simple map during establishment so emerging natives are not confused with weeds.
Schedule a few clear tasks instead of constant cosmetic cleanup: early-season weed checks, edge inspection, selective path-side cuts, watering during establishment, and one planned dormant-season edit. Avoid shearing every plant into the same shape; edit to protect the bed’s structure and access.
A compact planning sequence
- Measure the bed and map utilities, paths, windows, and service clearances.
- Use the sun-measuring guide and observe moisture after rain.
- Select one low matrix, two or three repeated flower groups, and no more structural anchors than the mature footprint can support.
- Draw the palette at mature width and check the view from the primary approach.
- Compare it with the measured 12 × 8-foot front-yard plan or browse all garden plans.
- Use the plant finder to replace any species that does not match the actual light or moisture.
- Penn State Extension — Principles of Garden Design ↗
- University of Maryland Extension — Landscape Designs with Native Plants ↗
- University of Maryland Extension — Pollinator Gardens ↗
- U.S. Fish & Wildlife Service — Chesapeake Bay conservation landscaping guide ↗
Design guidance does not establish county-level native status. Verify range and site fit separately using our source hierarchy.