Use weather and soil, not one regional cutoff date
A Pennsylvania mountaintop, a Baltimore rowhouse yard, and the Virginia Coastal Plain do not enter winter together. University of Maryland Extension says perennials can generally be planted whenever they are available and the ground is workable, while also advising enough time to establish before cold weather. Penn State Extension lists fall among the best periods for establishing native perennials. Treat those statements as a window, not permission to wait for the last unfrozen afternoon.
Plant as early in the fall window as the site and nursery supply allow. Cool air can reduce heat stress while soil retains warmth, and Penn State's 2026 native plug program describes fall plugs establishing roots in warm soil while top growth slows. Pause when the bed is saturated after prolonged rain, the soil is frozen, or a late heat-and-drought pattern would make consistent establishment water unrealistic. If plugs arrive after the workable window has closed, ask the grower for species-specific holding guidance rather than forcing them into frozen ground.
- Earlier in the suitable fall window usually provides more rooting time than a last-minute planting.
- A workable bed breaks apart without smearing like wet clay or resisting the tool like frozen soil.
- Local weather, elevation, exposure, and drainage matter more than a single date printed for the whole region.
Choose small plants for a measured bed
A plug is economical because most of the purchase is root system rather than finished top growth. Rutgers NJAES notes that smaller nursery plants can adapt readily and experience less transplant shock when placed in a suitable location. That advantage disappears if a dry-sun plant is put in a winter-wet pocket or if a shade plant is lined along a reflected-heat wall. Use the Plant Finder as a first screen, then confirm county-level range and site requirements with regional records and the nursery.
Lay out mature spacing before digging. Repeated groups make small plugs easier to water, mark, and edit than an assortment of single specimens. Remove competing weeds from each planting spot, but do not automatically till the entire bed or add fertilizer. Penn State advises soil testing before nutrient amendments, and many native perennials do not benefit from rich, heavily fertilized soil. Purchase nursery-propagated stock and never remove plants from wild populations.
Set the root plug level with the surrounding soil
Water the tray before planting so dry root balls do not repel the first irrigation. Open a hole just wide enough to accept the roots without folding them upward. Penn State's perennial guidance places the plant at the same depth it grew in its container and recommends gently freeing tightly bound roots. Backfill with the excavated soil, firm lightly enough to remove large air gaps, and keep the living crown visible at the original grade.
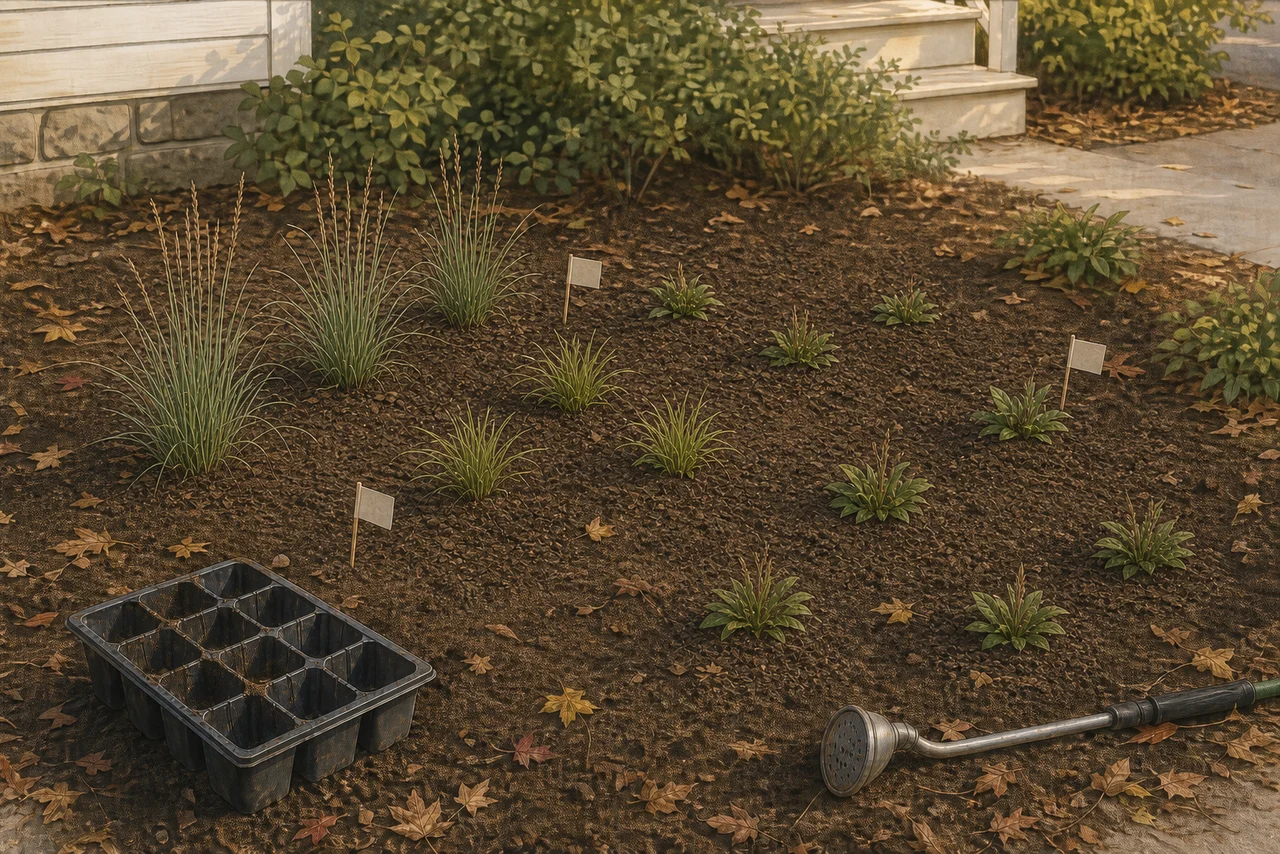
Do not leave the cylindrical root plug standing above the soil, where it can dry, or bury the crown beneath soil and mulch, where moisture can collect. Water each plant thoroughly after installation so the root ball and surrounding soil make contact. Mark the group with a small blank flag or durable label placed where it will not snag feet, wildlife, or maintenance equipment. Photograph the layout from a fixed point; tiny dormant crowns are otherwise easy to weed out in spring.
Water the plug, not the calendar
Fall rain is helpful but not a watering plan. Check the root zone rather than the dry surface alone, and water when the plug and adjacent soil are beginning to dry. A gentle shower at soil level is less likely to flatten a small plant or wash soil away than a hard jet. Clay may remain wet long after the surface looks dull, while sandy soil can lose moisture quickly; adjust to the bed instead of using the same automatic schedule for both.
As air cools and roots extend, reduce frequency rather than keeping the bed continuously wet. Continue checking during dry, windy periods while the soil remains unfrozen. Avoid routine late-season fertilizer: it cannot correct a drainage or light mismatch and may encourage poorly timed top growth. The goal before winter is contact between healthy roots and evenly moist, aerated soil—not visible new flowers or a flush of leaves.
Use winter mulch as protection, not burial
New plugs are vulnerable to repeated freezing and thawing that can lift shallow crowns. University of Maryland Extension recommends a light mulch around perennials after frost and warns against piling wood mulch over crowns. Penn State describes winter protection applied after the ground freezes to reduce heaving. Those instructions serve different sites and materials, so follow the relevant local guidance and use the least material that keeps the soil surface stable.
Shredded leaves can form a thin, breathable layer around—not on top of—the plug. In a colder, exposed garden, locally recommended winter protection such as loose evergreen boughs may be added after the ground freezes and removed gradually in spring. Do not seal the bed under plastic, mound wet leaves over crowns, or use deep mulch to disguise plugs planted too high. Keep flags visible and maintain drainage away from walls and paths.
Schedule a first-thaw inspection now
The installation is not finished when the tray is empty. After major freeze-thaw cycles, inspect the bed on a mild day. A crown pushed above grade needs gentle correction when the soil is workable; do not stamp frozen soil or tug a brittle dormant plant. Re-seat loose marker flags, clear heavy mats from crowns, and note areas where water pooled or mulch migrated.
In spring, allow species time to resume growth before declaring a dormant plug lost. Compare the bed with the installation photograph and check for a firm crown or new basal growth without repeatedly digging. Replace genuine losses with the same role only after deciding whether the cause was weather, poor drainage, wrong light, animal disturbance, or missed water. That diagnosis is more useful than automatically buying a different plant.
The working plant palette
These roles are a starting framework. Confirm county-level nativity, provenance, mature width, and nursery availability before purchase.
A clumping warm-season grass for a sunny, freely draining bed; keep its mature height and winter structure away from narrow walkways.
A low sedge candidate for dry-to-medium shade where repeated plugs can become a legible ground layer without deep soil disturbance.
A compact spring flower for part shade or gentler sun; mark the plug because its small fall foliage can be easy to disturb during winter cleanup.
A clumping spring accent for sun to part sun and dry-to-medium soil, repeated behind a lower edge rather than scattered one plant at a time.
A practical sequence
Confirm local nativity, light, drainage, mature spacing, healthy roots, and a workable fall weather window.
Arrange repeated groups at mature spacing and photograph the layout before leaves or dormancy hide the plugs.
Set each root plug at its nursery depth, backfill with site soil, water thoroughly, and add a safe marker.
Monitor actual root-zone moisture and add only locally appropriate winter mulch without covering crowns.
Inspect after freeze-thaw cycles and again at spring growth, correcting heave before replacing any plant.
- Fall planting does not compensate for a species placed in the wrong light, drainage, soil moisture, or native range.
- Do not force plugs into frozen or saturated ground; contact the grower when stock arrives too late or in poor condition.
- Keep mulch and wet leaf mats off crowns, and do not use fertilizer unless a soil test and the plant's requirements justify it.
- A dormant top is not proof of failure. Avoid repeated digging that damages roots while checking whether a plug survived.
Continue planning
- Filter by the bed's measured conditions: Use the Plant Finder for light and moisture before screening each species for local range.
- Lay plugs out as repeated groups: Adapt the Sunny Postage Stamp's clear groupings to a measured sunny bed rather than scattering single plants.
- Measure sunlight before ordering a tray: Record direct sun across the day so fall shade does not hide the bed's summer exposure.
- Make a young plug bed look intentional: Use a clear edge, visible markers, and repeated roles while the planting is still small.
- Plan plugs around established tree roots: Use the dry-shade guide when fall planting must avoid disturbing a mature canopy tree.
- University of Maryland Extension — Perennials: Selection, Planting, and Care ↗
- Penn State Extension — Incorporate Pennsylvania Native Perennial Plants into the Garden ↗
- Penn State Extension — Watershed Friendly Native Plug Kit Sale ↗
- Penn State Extension — Care and Maintenance of Perennials ↗
- Rutgers NJAES — Incorporating Native Plants in Your Residential Landscape ↗
- USDA NRCS — PLANTS Database ↗
Plant ranges and recommendations change as records improve. Read how we separate range, site fit, and design judgment in our sources and methodology.